Yeast Ranching
For the last couple of years, I have made a habit of at least “attempting” to preserve a culture of any rare or interesting yeasts I have come across. At first, just to see if I could… but soon after that, to try to re-create (clone) the beers I cultures them from. As of late however, I’ve been getting a little more serious about maintaining an honest to goodness yeast bank.
I know exactly when I got hooked. A fellow home brewer brought a bottle of Rochefort 8 Belgian Trappist Dark Strong Ale to a local hombrewer club bottle share that I was hosting, and I gleefully swirled the yeast dregs into a 500ml Erlenmeyer flask, added a quickly (read: not sterile) stirred up 1.040 wort of DME and tap water, added it to the flask, and set it on a stir plate. Sure enough, about 4 days later the culture had grown, and didn’t look or smell bad, so I brewed up my best guess at a Rochefort 10 clone and dropped the yeast in. It was stellar. Not only did the beer turn out really great despite my lack of technique and half-assed sanitary practices, but I was completely enamored by the idea that these little yeast cells started their life in a Belgian Monastery – quite possibly the great-great-great-grand children of 10,000 generations of yeast that the monks had been lovingly culturing in that very spot for centuries. Rochefort has been brewing since 1595! The little guys that, against all odds, made it across the oceans and nations, getting hot, getting cold, sitting on shelves, getting shaken, all at the bottom of a single bottle – in the most inhospitable environment imaginable, only to be thrust into action in my brutish and unforgiving way… well, they actually managed to make me a really decent beer. Suddenly the possibilities became endless…
I knew I had to do it right the next time though, and I got my chance pretty quickly. I purchased a bottle of Ommegang, and noticed yeast sediment. I did some quick research on the interwebs, and found that Ommegang not only uses one single strain for all of their beer styles, but they also bottle condition with the same strain. I was in luck! This might just be a viable sample! As it turns out, I later discovered that it’s quite a coveted yeast among homebrewers. As Ommegang is partnered with Duvel, and procured their house yeast from a Belgian University, homebrewers have long been culturing it for their personal use. This would be a perfect strain to hone my skills on. I managed to create a slightly more sterile environment, grew up about 200mls and preserved half a dozen samples on agar slants. Mission accomplished.
I have made slants before, I have grown up full starters from slants, but one thing I had yet to attempt was to actually streak plates and grow single cell colonies; pluck up one of those pure colonies, and ramp it up from a single cell all the way up to the 100 billion cells required to pitch into a five gallon batch. I know the theory, I had made a nichrome inoculation loop, and alcohol lamp for flaming the loop and test tubes. I am good at making growth medium, and a lot better at keeping things sterile. I’ve just never gone “all the way” … until now.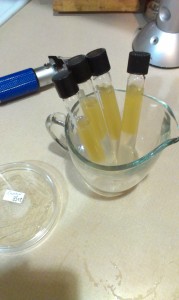
Conan. Vermont Ale. The Heady Topper yeast. Whatever you call it, when a sample of this legendary yeast came my way, I knew I had acquired my next target. The late great Greg Noonan started using this unique strain (rumoured to have been of U.K. origin) at his Vermont Pub and Brewery, and quickly rose to fame. More recently, The Alchemist (a small family run brewery in rural Vermont) rose to legendary status when their Heady Topper IPA was voted to be the best beer on the planet in 2013.
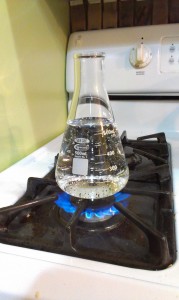 I began with a sterile alcohol swabbed environment, and then sterilized all glassware (flasks, test tubes, petrie dishes) in a pressure cooker for 15 minutes. Growth medium was boiled for 10 minutes over flame, agar added, then dispensed using sterile pipettes, into petrie dishes which were then set in the fridge to harden.
I flamed my loop, cooled it by touching it to the agar plate, flamed the mouth of the test tube holding my Conan culture, then dipped the loop into the existing culture to retain a single drop. I then streaked the loop across the plated growth medium in a zig-zag such that a single cell width impregnated the agar. Oh, by the way, it’s important to keep the flame burning on your work area – this creates an up-draft so that any airborne bacteria 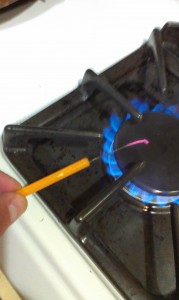 are blown upward as opposed to drifting downward onto my sterile work area. I do have an alcohol lamp, but since I was already using the gas stove I figured that was even better in this circumstance.
The streaked plates were left on the counter at room temperature for 3 days and sure enough, new colonies sprouted up all over the plates. This is where I was expecting to see isolated contamination; ie: bacteria growth or unexpected colonies in addition to the yeast that was growing in streaks – but amazingly enough, my sanitary practices paid off, because not a single 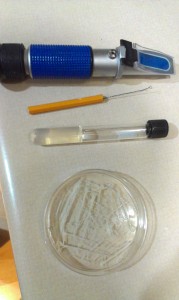 plate needed to be discarded! Incidentally, 3 weeks have now passed and while the plates have been refrigerated for that time, they still all look great.
The next step is to pluck up some of these new colonies that have started growing from single cells, and start stepping them up to a usable level in the neighborhood of 100 billion cells. Here’s where sanitation is everything … if pluck up 20 cells and one of them is not what you expected (bacteria,
wild yeast, etc) then when you grow it up to 100 billion cells, you’re in a world of hurt. I opened 6 sterile test tube slants, flamed the mouths, flamed my inoculation loop, and plucked one colony into each tube. Added 1ml of growth medium, and let sit at room temperature for 2 days. Again, they all 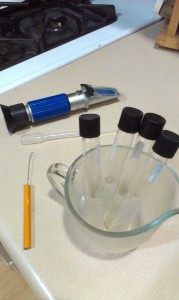 looked great – I was expecting to have to cull one or two, but that wasn’t necessary. I picked two samples and stepped them up into a tube with 10ml of growth medium. two days later that was stepped up in a 250ml flask on a stirplate, and finally another 3 days in 500ml of growth medium.
I don’t have a powerful enough microscope (yet) for cell counting, but by volume I’m estimating that I’ve hit the 100 billion cell mark. Time to test it! I brewed up a nice light IPA (5.5% ABV) with Centennial, Magnum, Cascade, Columbus and Falconer’s Flight hops, and pitched my beloved Conan culture. The next day it was off to the races and working voraciously! Three weeks after that, I was drinking the beer and instantly recognizing that signature Conan taste. BIG SUCCESS! The pint pictured at the bottom was poured on the first day of kegging and is still a bit hazy (which I expected from Conan) but in the days to follow it really cleared up well – of course, I have a hop screen in my keg, so it’s probably getting filtered through hops on the way to the pint glass now 🙂
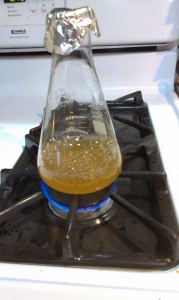 Upon hearing that I was culturing Conan, one of B.C.’s preeminent commercial brewers requested whether I could provide him with a pure sample, and so I repeated the process of plucking a culture from a plate and stepping it up to about 100 billion cells. Again, with amazing results.
I know that he’ll be using this sample in test batches, but I can only dream that maybe some day an entire production line of BC Craft Beer gets fermented from the offspring of one single cell that I grew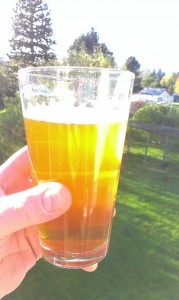 in my little home brew lab. It’s truly humbling to witness the power of yeast – a pure lineage who knows how many decades or centuries old – reduced to a single cell then bred back into the billions in the space of a week, and still able to turn sweet water into delicious beer as well now as it did when we mere humans didn’t even know it existed.

Latest posts by Calvin Quaite (see all)
- Craft Brew, Home Brew, who’s feeding who’s growth? - September 25, 2014
- What is a pint worth? - July 10, 2014
- Kid Friendly Craft Beer Establishments in British Columbia - July 7, 2014

Recent Comments